By Iffy with suggestions from Redbeard
I've been (re)learning tons about assembly line painting as I motor though the endgame finish of an army challenge and get through painting over 100 orks in between blocks. If I get my Ork Boyz done by 1/17/09, which I am on track to do, I will have finished 223 figures in 3 months. This 30 day period alone, I will have finished 99 Orks and 9 Deffkoptas. Here's how they turned out.

Just to set some context, when I paint in assembly line fashion, I'm talking about painting 50+ figures at a time. For the Tyranids, because they all have the same color scheme, I was painting 60 figures at once. For the Orks, I worked on a batch of 99 Boyz and Nobz. However, the process works for smaller figure counts too, I just happen to paint in large lots. Also, just because you're using an assembly line methodology doesn't necessarily mean you need to compromise on quality.
The key to maximizing the speed of your assembly line is to execute steps in the shortest amount of time while retaining your accuracy to minimize rework. Many people interpret this as 'work on one color' at a time. The truth is really a little bit more precise. It's work one color with a given brush at a time. Every time you have to change brushes, you lose time. Every time you have to manipulate your figure, looking for the next piece to paint, you lose time. So how do you set up your assembly line.
Break your painting process into small steps
One of the things I've learned is to break figures into discrete little repeatable blocks of color that can be done quicky with the same brush. By this, I mean sub steps to a particular color. For example, the AOBR Orks have tons of straps, I separated them into like body types, and then did all of the back straps, then all of the front straps, rinse and repeat with the next block of figures. Another example is the gun metal. I was able to hit most of the armor and weapons with a #4 flat brush, which was too large for the toe caps. These were handled as a separate step with a #1 round brush. Had I allowed myself to get into the rut of "must finish the gunmetal", I would be swapping brushes back and forth.
Your goal is also to minimize the amount of figure turning and manipulation, which results in you having to search for what to paint, you are not only improving your speed, but you're also reducing the amount of missed items that need to be corrected later. This allows you to learn things from a step (what needs to be painted, how, most efficient way to do so) and apply them consistently across models.
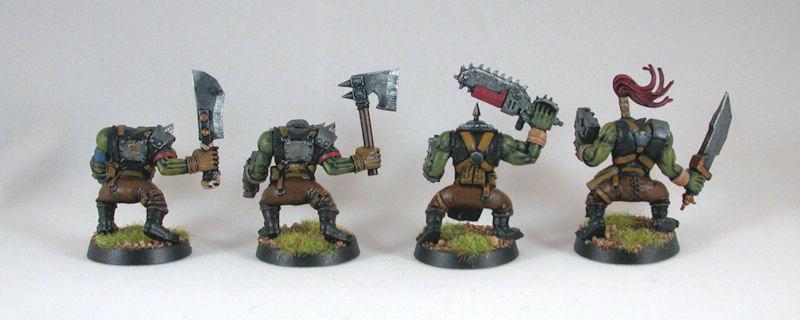
Here's a front and back snapshot of some of the body, head, and arm styles available in the AOBR set. Depending on what I was painting, I would group figures by weapon type, helmet style, or body type and then complete a grouping before moving onto the the next. Yes, this meant I was painting the same thing for 15-20 figures sometimes, but you get really fast at it.

Consider order of operations and color selection
Always work from largest sections to smallest, so you can get the most use of larger brush sizes. Don't worry about mistakes over the lines of things you haven't painted yet, as with a little careful colour selection (especially foundation paints) you can just go right over it with the next colour. This has the added bonus that if you need to put them on the table top, they'll be more complete than if you had started out with the little bits.
About 'hard' colours - If you're doing one of the traditionally hard colours (yellow, red, white), it can help to base coat the whole model in that colour (spray cans/air brush/really big brush) and then go back and black-over or use washes on the things that shouldn't be that colour. Getting the hard colour down first is worth it.
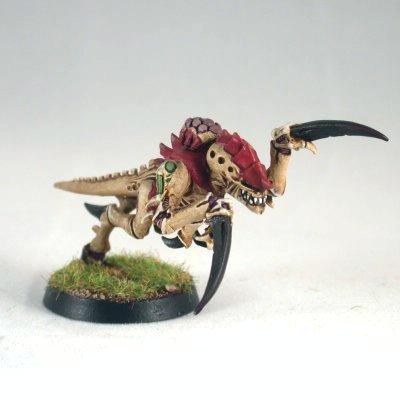
Color selection also has implications on how easy it is to wash your figure. When I was picking colors for my Tyranids, I waffled between a bone-purple and a bone-red scheme. I ultimately went bone-red, because I could use the same wash over both the red and the bone, allowing me to execute a single, fully body wash. The bone-purple scheme would have required 2 washes, one for the purple and one for the bone and would have also required a lot more time consuming, precision on the application of the washes so that it didn't bleed over onto the other colors.
Squeeze the inefficiency out of each step
Ideally, you want to use the biggest brush that can complete the most work, ideally in a single stroke. Detail work in the same color should be handled in a different step. Tyranids are a good example. Typically, a person might try to tackle the carapace color in one go. Because a larger brush won't be able to handle the details, many people will default to a smaller brush. However, if you break the painting process up into component steps, then there is no reason why you can't block out most of the painting with a very large brush (#4 flat in my case) and the return with a smaller brush (#1 or #2 flat) to do some of the edging work later.
When I'm painting in an assembly line, I try to avoid the mixing of colors. It just takes too long for me and the results are a little inconsistent. However, if you find yourself using the same color all the time, go ahead and mix big batch in a spare paint pot, so that it's always there when you need it.
Don't disrupt the process
Once you get into a rhythm, don't break it. As you paint your figures, you're going to find things that you missed. Don't stop to fix it. Simply set it off to the side where you can find it again, and get to it when you're finished with your current step.
On the note of mistakes, do not allow yourself to slip into trading off speed for accuracy and precision. It may feel like you are moving more figures, but each figure you overpaint or underpaint may be a figure you have to come back to a second time. Don't paint anything faster than you can paint it neatly.
Stay organized
I have a pair of small boys, so I have a lot of shoeboxes lying around the house. The shoebox lids are just the right size to hold 20-25 figures and I use these to group figure. As I take a figure from one box and finish the step, I move it to another shoebox lid. It's easy to tell when I've finished the group. These shoebox lids help demark figures in different stages of painting and give me an easy visual of whether I've hit every model.
There you go. A couple of notes and thoughts on assembly line painting that can really help you boost your throughput. Hope this was helpful.
