Colour Scheming with Photoshop
In this article I'm going to be describing a technique for easily testing out colour schemes on models without ever picking up a brush! Even better than that, no painting or modelling skills are required. Sounds crazy right? Crazy like a fox! Crazy enough it just might work!
For this technique you'll need a copy of Photoshop. I'm using Photoshop CS5.1, older versions will work just as well but some of the wording/menu layouts may be slightly different. Other software packages such as GIMP may work, although as I am only familiar with Photoshop the exact steps may be different. The main features you'll need are Layer based editing, and control over the blend modes of your layers.
The basic premise to is re-colour a photo of an existing painted model, so without further ado, lets get started!
1. Go to the Games Workshop website and browse to the unit or model you want to test your colour scheme on. I'm a big fan of the new Grey Knight models, so I'm going to be using the Grey Knight Terminators.
2. Enlarge the product image, right click on the enlarged image and select 'Copy Image' (this is the wording in Chrome, it might be different in other browsers). This is the image I'll be using.
3. Open up Photoshop, create a new document and paste the product image in. In this instance, the product image is a shot of a whole unit, so I'm going to crop it down to just one model. I like the look of the guy in the top right, so lets use him.

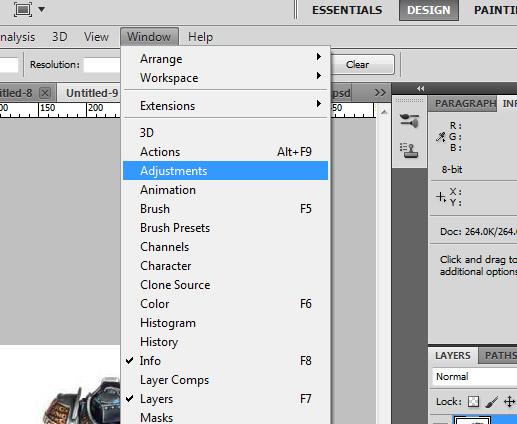
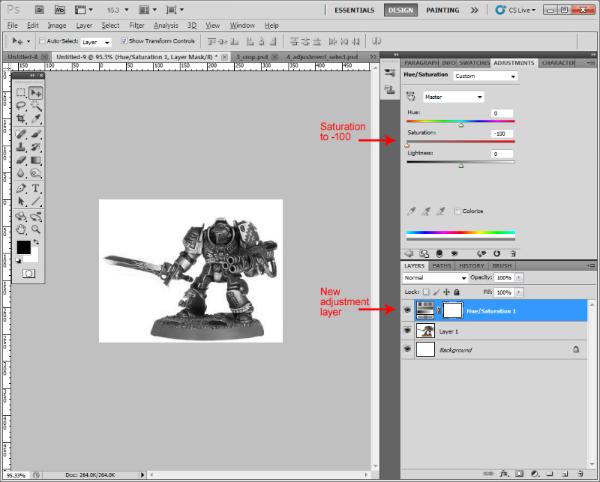
4. We now need to adjust the saturation of the image so that all colour is removed. There are numerous ways to do this, but the best technique in this instance is an Adjustment Layer. Using an Adjustment layer is an example of 'non destructive' image editing, and while I won't be going into detail on that topic here, it's the right technique for the job. Go to the 'Window' menu and bring up the Adjustment window. Make sure your product image layer is selected, then click on the 'Hue/Saturation' option. This will create a new layer above your product image and will also change the layout of the Adjustments window, giving you control over Hue, Saturation and Lightness.
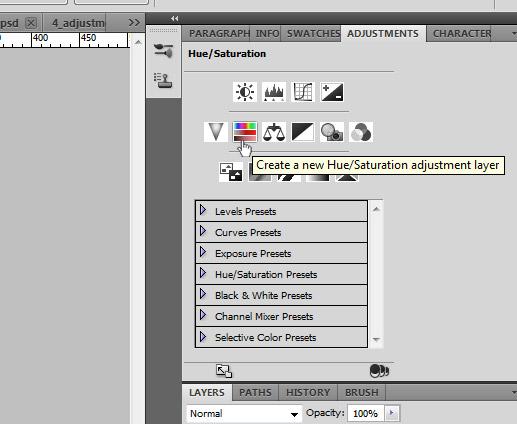
5. Drag the saturation slider all the way to left, or set the number to '-100'. Your product image should now be completely monochrome!
5b. (optional): At this point you may be thinking: 'That's cool, but I really liked the paint job on that guys base, and the sword is pretty cool too.' Fear not! If you want to retain the colour from part of the model we can use a 'mask' on the adjustment layer - only the unmasked areas will be desaturated. Handily an adjustment layer has a mask attached to it by default - it's represented by the white square thumbnail in the Adjustment Layer (see pic). To mask an area, click on the mask in the layer window, then use the paintbrush to paint pure black onto any of the image you want to retain colour. Paint with the adjustment layer selected, not onto the original image. I've kept the guys sword and his base as the original colours, as they'll fit in nicely with the colour scheme I have in mind.

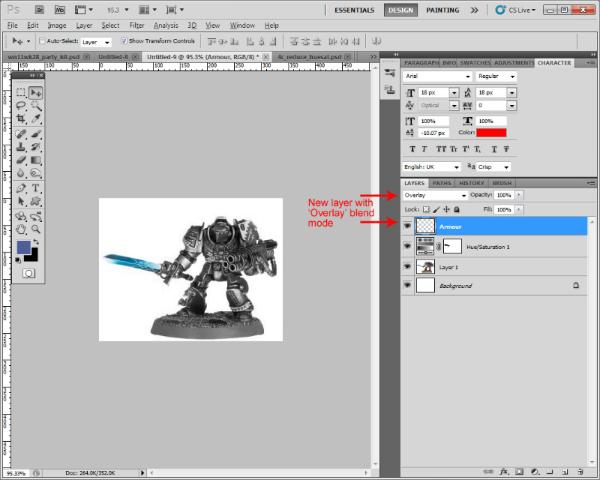
6. Now the fun bit, recolouring the image! Thankfully, it's also the easiest bit. Lets start on the armour. Create a new layer and make sure it's positioned above the Adjustment layer. With your new layer selected, choose 'Overlay' from the blend mode dropdown at the top of the layer window. The Overlay blend mode is very useful; it applies all colour values in the layer to any non-white pixels in the layers below it. The brightness of the pixels are still mainted, so even if we paint a flat red colour onto our Overlay layer the highlight and shading of the original image are still maintained. We don't have to worry about sticking to the edges either as white pixels aren't coloured. If you use the paintbucket tool to fill the Overlay layer with pure red, you'll notice that only the miniature itself is coloured red, the white background of the image remains intact.
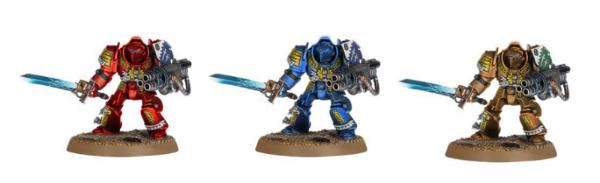
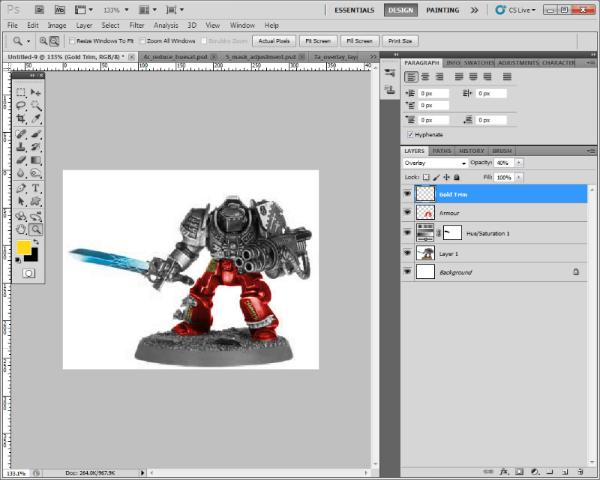
7. Go crazy! Paint whatever colours you like onto your overlay layer and you're minature will be recoloured.
Pro-Tips:
- Create a new Overlay layer for each different part of the model (ie. Helmet, Gun Barrel, Purity Seals, Banner etc). If you change your mind about the colour of a specific part of the model, select the appropriate Overlay layer then adjust the 'Hue' of that layer using the 'Image > Adjustments > Hue/Satuation' menu option. For those that have been paying attention, this is an example of 'destructive' editing (as opposed to our non-destructive adjustment layer), as the original pixel data of the Overlay layer is changed.
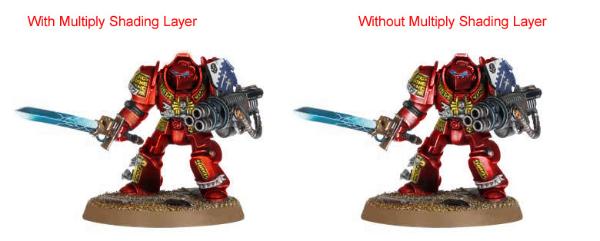
- You may notice that the extreme white highlights of a model don't get recoloured by our Overlay layer - this is because Overlay layers don't affect white pixels. It can look a little weird if you have a deep red armour scheme with extreme white highlights. In reality those highlights would be orange or yellow. To counteract this, create another layer (above the Adjustment layer and any Overlay layers) and give it the 'Multiply' blend mode. In the same way that you'd apply highlights to an actual model, select a lighter shade of your overlay colour and paint over the highlighted areas. If things look too blocky, try dropping the Hardness and Opacity of the brush down until it blends nicely. Below is an example of a model with and without a Multiply highlight layer.