Oil Washing
Example of oil washing provided by Redfinger . All images of the soulgrinder are his work. Parent article Painting with oils

At this point the model received another clear coat to provide a solid surface for the oil blending to take place on. Typically it is best to oil blend on a flat surface, that is what creates the really soft blends. I use Windsor Newton Artists Colors, specifically Burnt Umber was used for the shading on the skin.
This is where I left off on it tonight, I need to let this layer fully dry a day or two before I take the shades darker and bring out some of the highlights in green. The thing to remember when working with oils, is that a little goes a loooong way, it is nothing like working w/ acrylics, it takes a soft touch and smooth application.


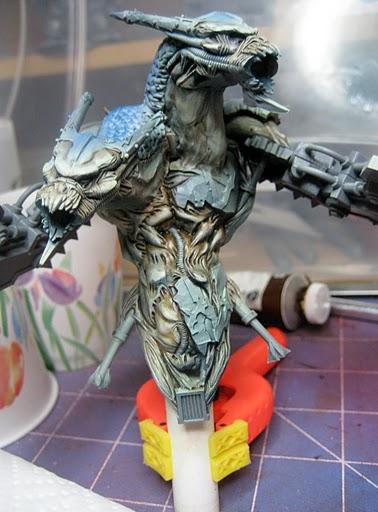
So the major differences between these pictures and the last ones is the further shading and blending with oil paints, and the painting of the armor plates. After the initial blending had dried I clear coated them and hit the shadows again with the burnt umber mixed with a little black, then brought the highlights out by mixing a little green white and black, that made a real difference and to me helped me achieve the subtle green/gray tones I was looking for. I finally settled on a blue for the armor plates. To achieve the look I did the following;
All armor plates were first painted with "Vallejo Black Red" this provided a solid rust colored foundation
Then I coated each plate w/ crackle medium
Then a layer of Vallejo Pale Gray Blue was brushed on, followed by a Prussian Blue wash.
The metal bits were painted black, then stippled with Tin Bitz, Shinning Gold, and Bolt Gun, then washed w/ Badab Black
At this point the whole armor plate was washed w/ badab balck.
After that layer dried I went back in with the Burnt Umber Raw Umber and some reds and oranges and made the rust streaking.