by lindsay40k
So I've been doing some Ork conversions lately and have got the hang of sculpting chains from scratch. A stage by stage was requested, so I took photos of this one to show the technique I've developed for sculpting big chains that have to bear a little weight or hold a dynamic shape.
Equipment
I used a Gale Force Nine sculpting tool, Staples paperclips, and Kneadatite GS from thetrolltrader.
Stage 1: Build a frame
With this technique, we start with a wire frame and build a chain around it. A simple paperclip will suffice for most purposes; you can get thinner wire and wire that's more durable (and harder to work with) at model shops.
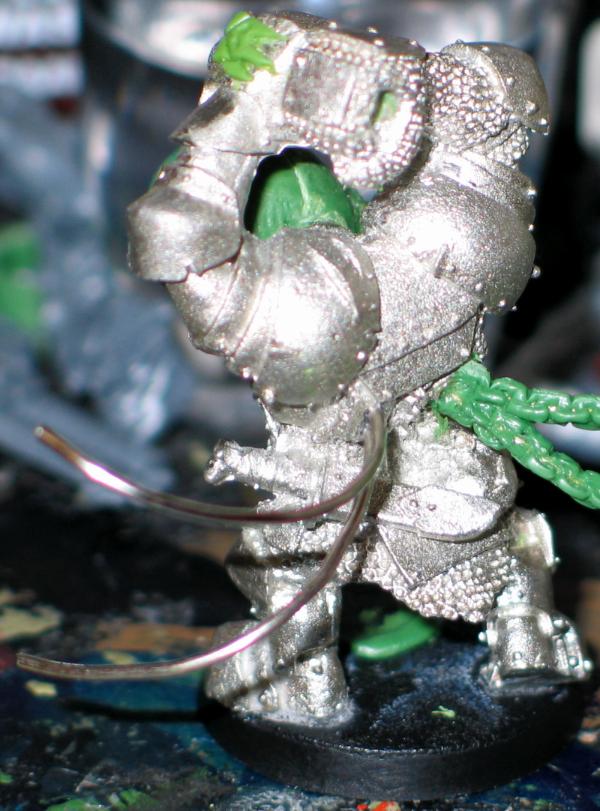
Drill a hole for the paperclip to go into, and bend and cut the paperclip into shape. I find it's best to glue it into position now, so that it is stable during sculpting. If you need to use tools to bend your wire, be careful not to make scratches on it as this can lead to snapping at a later time.
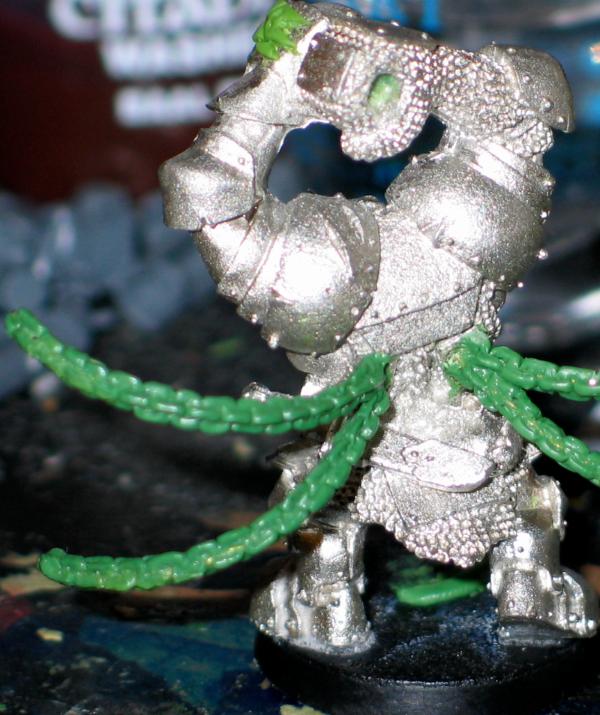
I've bent these into curves as I'm trying to make the model recall an octopus. In most cases, a model will look more dynamic and natural if there's a weight at the end of the chain - a weapon, skull or body - that is swinging around or hanging loose and keeping the chain taut; chains don't tend to behave like a dancer's ribbons.
Stage 2: Apply Green Stuff
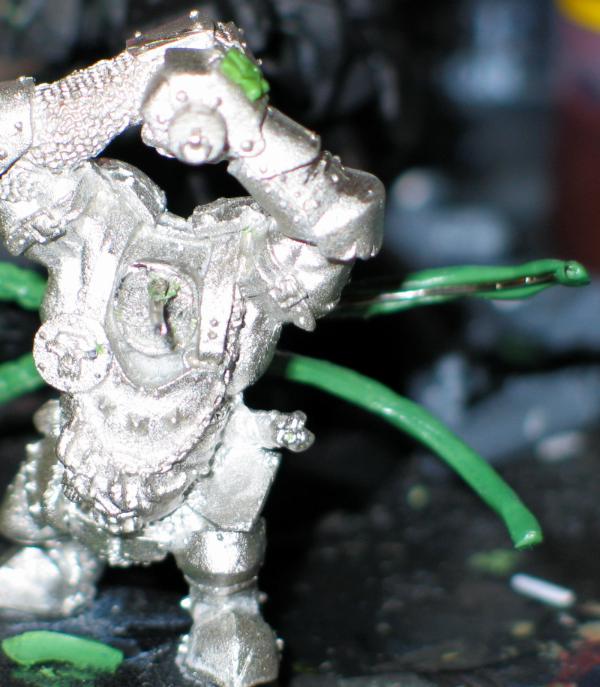
You need a long thin sausage of GS for this, with a diameter a little less than half that of the wire you've used. Use a bit more yellow than blue, as this makes it stick better.
Press the sausage onto the length of the wide, and use a blunt headed sculpting tool to press it all the way around until the wire is as evenly coated as you can make it. A pin can be used to probe how deep the GS is and check that the wire is as central as possible, and tell you where it's misaligned.
Stage 3: Basic shape forming
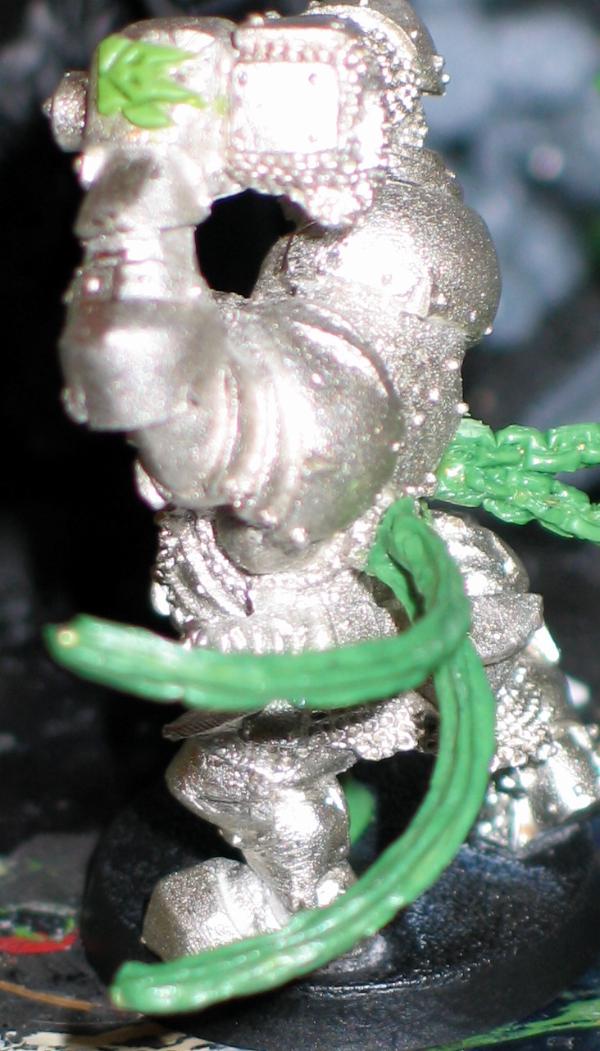
The basic cross-section of a length of bulky chain is a '+' shape. Use a sculpting tool to work four parallel grooves into the GS that run the length of the sausage. The shape should be consistent all the way along - even Ork chains look odd without a standardised link size.
You may need to add small sausages of additional GS to build up areas that are too thin. I advise mixing fresh GS for this and using a little more yellow than normal, otherwise it can be difficult to make it merge well.
Stage 4: Basic link sculpting
Take a thin edged sculpting tool and press sequential indentations all the way along one of the raised edges of GS. Keep them as consistent as possible. Make sure that the first indentation is where you want the first link to start, and the last one should likewise be where the chain should end. You should easily be able to press out indentations if you need to respace them.
With one edge indented all the way along, press indentations into the edges next to it. Make sure that these indentations are exactly in the middle of the indentations made in the previous point. Then, use this as a guide to make indentations all the way along the remaining edge.
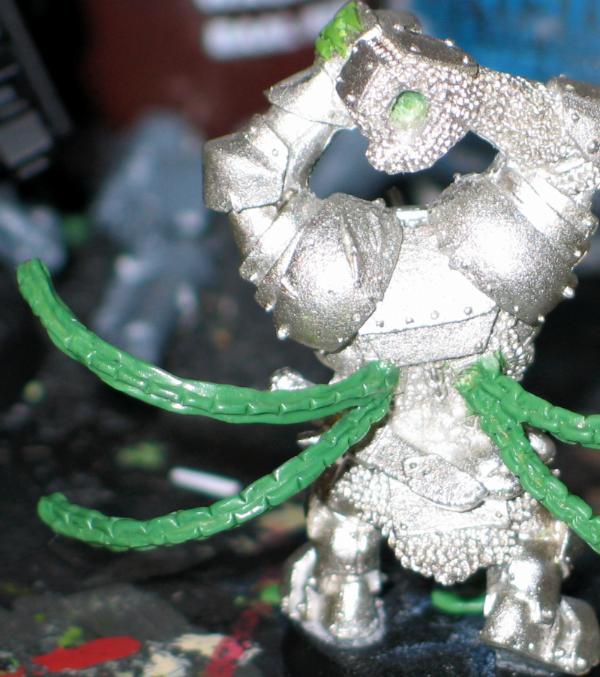
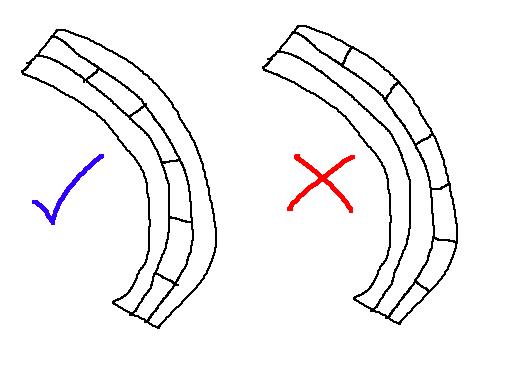
If your chain is curved, I found it a bad idea to start indenting the links on the inside or outside of the curve - it's easier to mark the ones on the middle and use that as a guide for making the inner and outer links work. The outer links may need to have the thin indentation widened into a gap, as the links should all be the same width.
Stage 5: detail sculpting
This is the really fiddly bit. You need to take a thin tipped sculpting tool - I don't use a sharp pinpoint, but it may work for you - and develop the indentations to shape the links. The ends of the links need to be rounded off, and they need to be going into the holes in the middle of the two adjacent links - that hole needs to be pressed.
I hope this article is useful and inspires your hobbycraft!